
Creating Your Signature
When you sign your first document, you'll be prompted to create a signature and initials. That signature and initials will be saved for use on future documents.
Create your default signature
- Click the Review & Sign button in the signature request email. This will take you to the signing process
- Within the signing process, navigate to a signature field.
- Click the signature field. This will load the signature dialog.
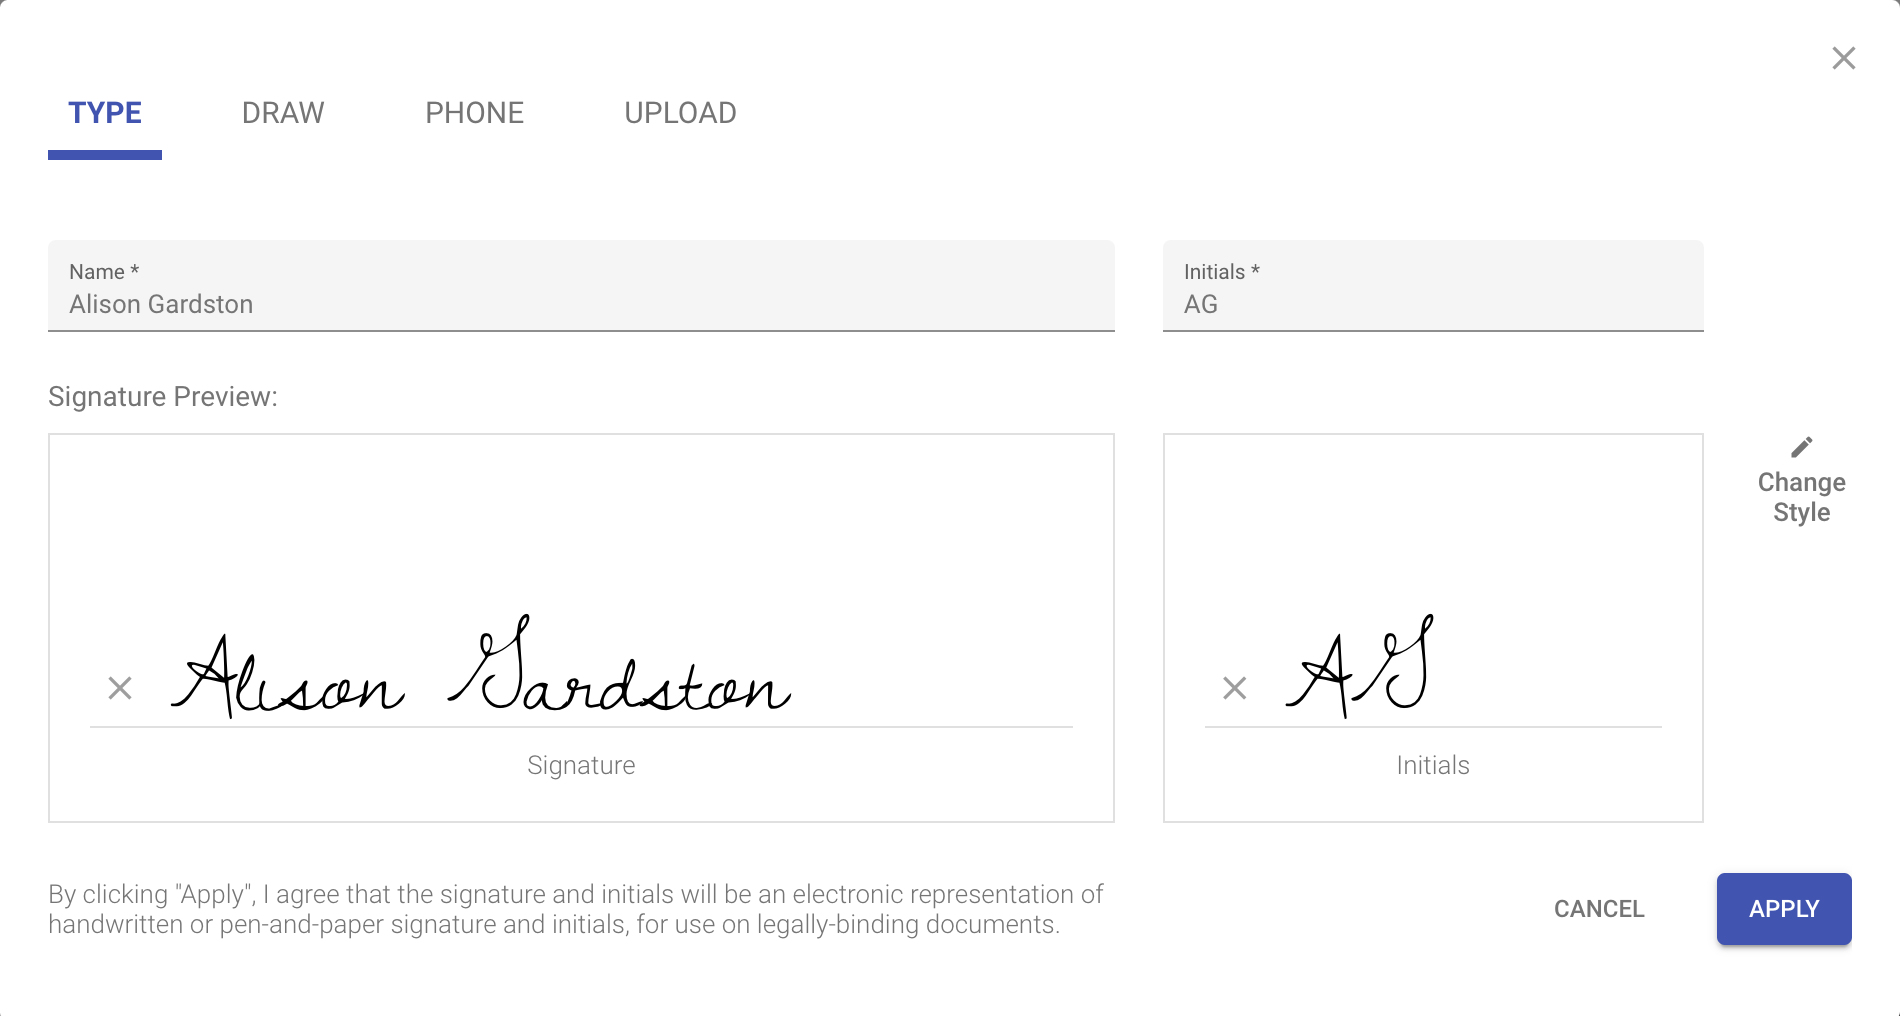
- Choose the type of signature you'd like to create; Type, Draw, Phone or Upload
- Add you signature. Click Apply.
Signature types
- Type - The signature is automatically created based on the values entered in the Name and Initials field. These will be pre-populated for you based on the information entered by the sender. Modifying the information in the Name and initials fields will modify the signature itself. You can also choose Change Style to choose a signature style that matches your personal preference.
- Draw - The draw tab gives you the option to draw your signature using your cursor, finger or a stylus.
- Phone - This option is only available on desktop. With the Phone option, you can choose to send it to your phone to sign on your mobile device. Simply scan the QR code and the signature process will be moved to your mobile device. You'll be able to sign in both portrait or landscape. We generally recommend you rotate to landscape to give yourself a little more space to sign. Once completed and apply on your mobile device, the signature will be applied to the document.
- Upload - The Upload tab allows you to upload the signature from your device. This is used when you would prefer to sign on paper and upload the paper signature. Simply click the upload button to upload the file from your device.