Recipients are the people you are wanting to have either take action on the document or be copied on the document. Recipients do not need an Upsign account in order to receive or take action on the document.
When adding recipients, you can choose whether they; need to sign the document (complete fields or actually apply their signature), need to approve the document, or whether they should receive a copy.
Note: If you want to sign your own document, you simply add yourself as the person you want to send it to. You can then send it to yourself to sign or add others to sign as well. As the sender, you will automatically receive a copy of the completed document and will also be able to access a downloadable copy from the Upsign interface.
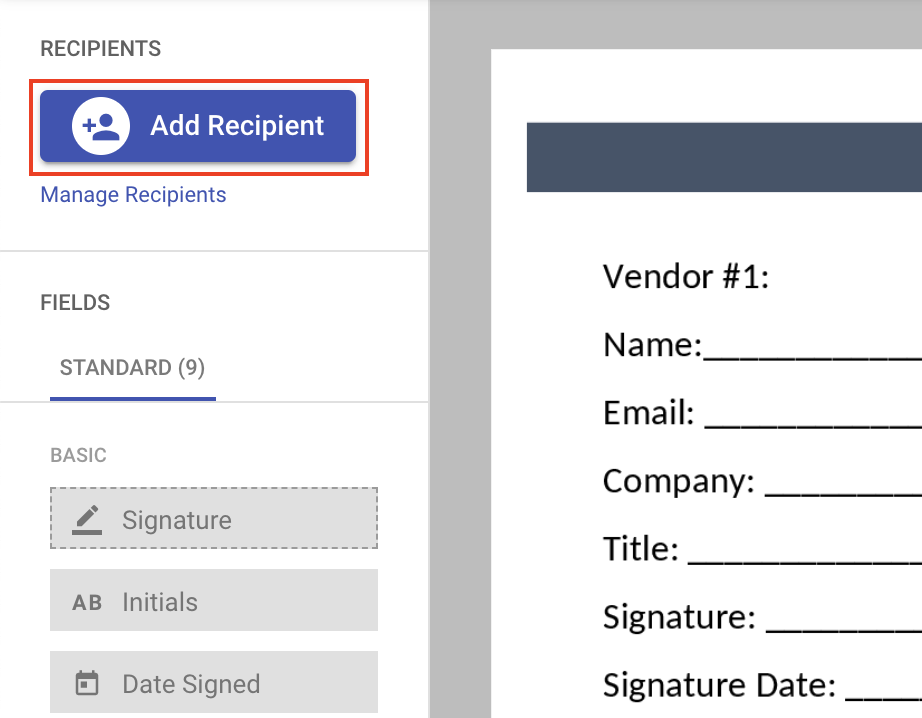
Follow these steps to add recipients:
Click Add Recipients from the document creation area
You can add recipients in two ways:
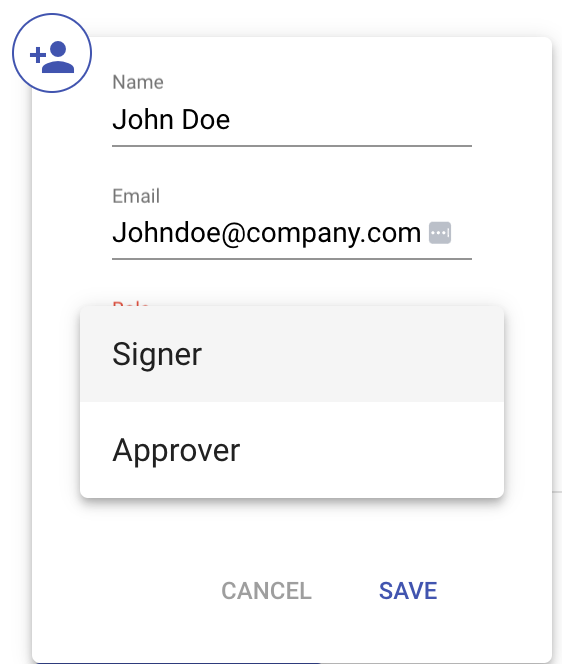
Add New Recipient - Manually enter the name and email of the recipient
Add from Contacts - Choose the recipient from your contact list
Tip: When you Add From Contacts, you can choose an individual recipient or a signing group. See adding a signing group to learn more.
Select the recipient role by choosing an option from the dropdown. The available recipient roles can vary based on package type.
Optional: Add CC's (Carbon Copy recipients) - These recipients will not be able to take action on the document. They will receive a notification the document was sent and a copy of the completed document.